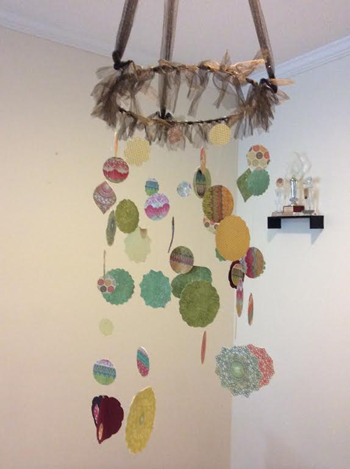
Dreamy Paper Chandelier
Making things by hand is fun and a satisfaction to someone like me...i am sure you will like this craft item because you are already reading my lines here...
Paper Chandelier, famously known as Paper Mobile among the craftsy crowd..
I used a metal ring that came with my hanging plant holder ( you can use a flour sifter ring, cut the wiring mesh or use as-is, or a foam (thermacol) ring used to make wreaths.
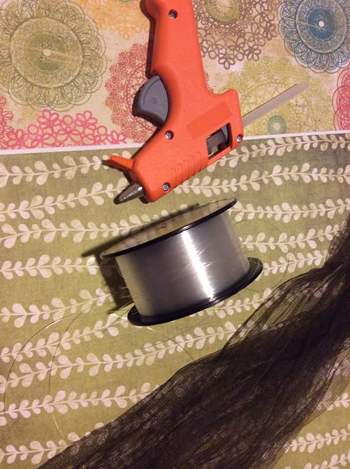
I used transparent fishing wire ( you can use transparent embroidery wire)
Hot glue gun for quick and stronger hold
Printed papers with design ( you can buy the thicker versions)
Thick Drawing sheets to paste the printed paper on both sides
Spray adhesive or a painting brush and glue to apply the glue to the drawing sheet
Net fabric in your choice of color
.png)
Because i couldnot find thicker printed paper, i bought the papers, Sprayed glue on both sides of the thick drawing sheet and stuck the paper to it. Once it was fully dry, i started cuttting different shapes and sizes of pieces. you can think of butterflies, hearts, circle shapes etc.
then i glued different lengths of wire pieces to the ring. and then glued the cut paper designs to the ends of the wire pieces. If you are at this step, make sure you give atleast few seconds for the glue to dry before moving to the next piece.
After glueing all the pieces, i then cut tiny bits of the net fabric and simply tied them between each wire around the ring, covering the open edges of the wire. And finally with three long ribbons cut from the same fabric, i hung the ring to a hook in the ceiling.
Voila !!! i was so happy to see my paper chandelier aka Mobile filling that void space in the room, so beautifully. People will fall for it, if you do it too. To make it easier, instead of paper, you can use felt pieces to hang.