Benefit Of Yoga For Back Pain
.jpg)
But if you have been suffering from back pain, you might reconsider. Pain relief is just one of the benefits of practicing yoga. You might also experience an improvement in your mental and emotional health that causes you to be relaxed and focused for the demands of your busy life.
* Fists Forward Bend
Stand with feet hip-distance apart. Bend your knees and release your torso over your legs until your belly touches your thighs (or as close as you can get). Make two fists and place them in the opposite elbow creases. Relax your back, neck and head, and squeeze fists actively. Fists and bent elbows together are a central nervous system trigger that causes your back muscles to open. You’ll feel it after just a few breaths! Take 10-20 breaths here, releasing more tension from the back with every exhale.
* Wall Plank
Stand in front of a wall at arm’s length. Reach forward from your shoulders and plant your palms on the wall, fingers wide, middle fingers pointing straight at the ceiling. Firm your fingers into the wall and draw your navel back as you lengthen the tailbone towards the floor.
Lift your ribs from the pelvis. You want to work with a natural lower back curve but an active belly. Keep length in your spine as you begin to walk the legs back, folding at the waist, and walking your hands down the wall.
Eventually you’ll come to an L-shape as seen here. If you can’t get there today without feeling pain or rounding in the lower back, bend your knees and maintain the proper spinal alignment.
As you lift the navel and lower ribs into the body, reach long through the tailbone and legs into the floor while reaching the spine, arms and head towards the wall. Repeat for 10-20 breaths, then fold into Fists Forward Fold once again. Move to the next pose after a few breaths.
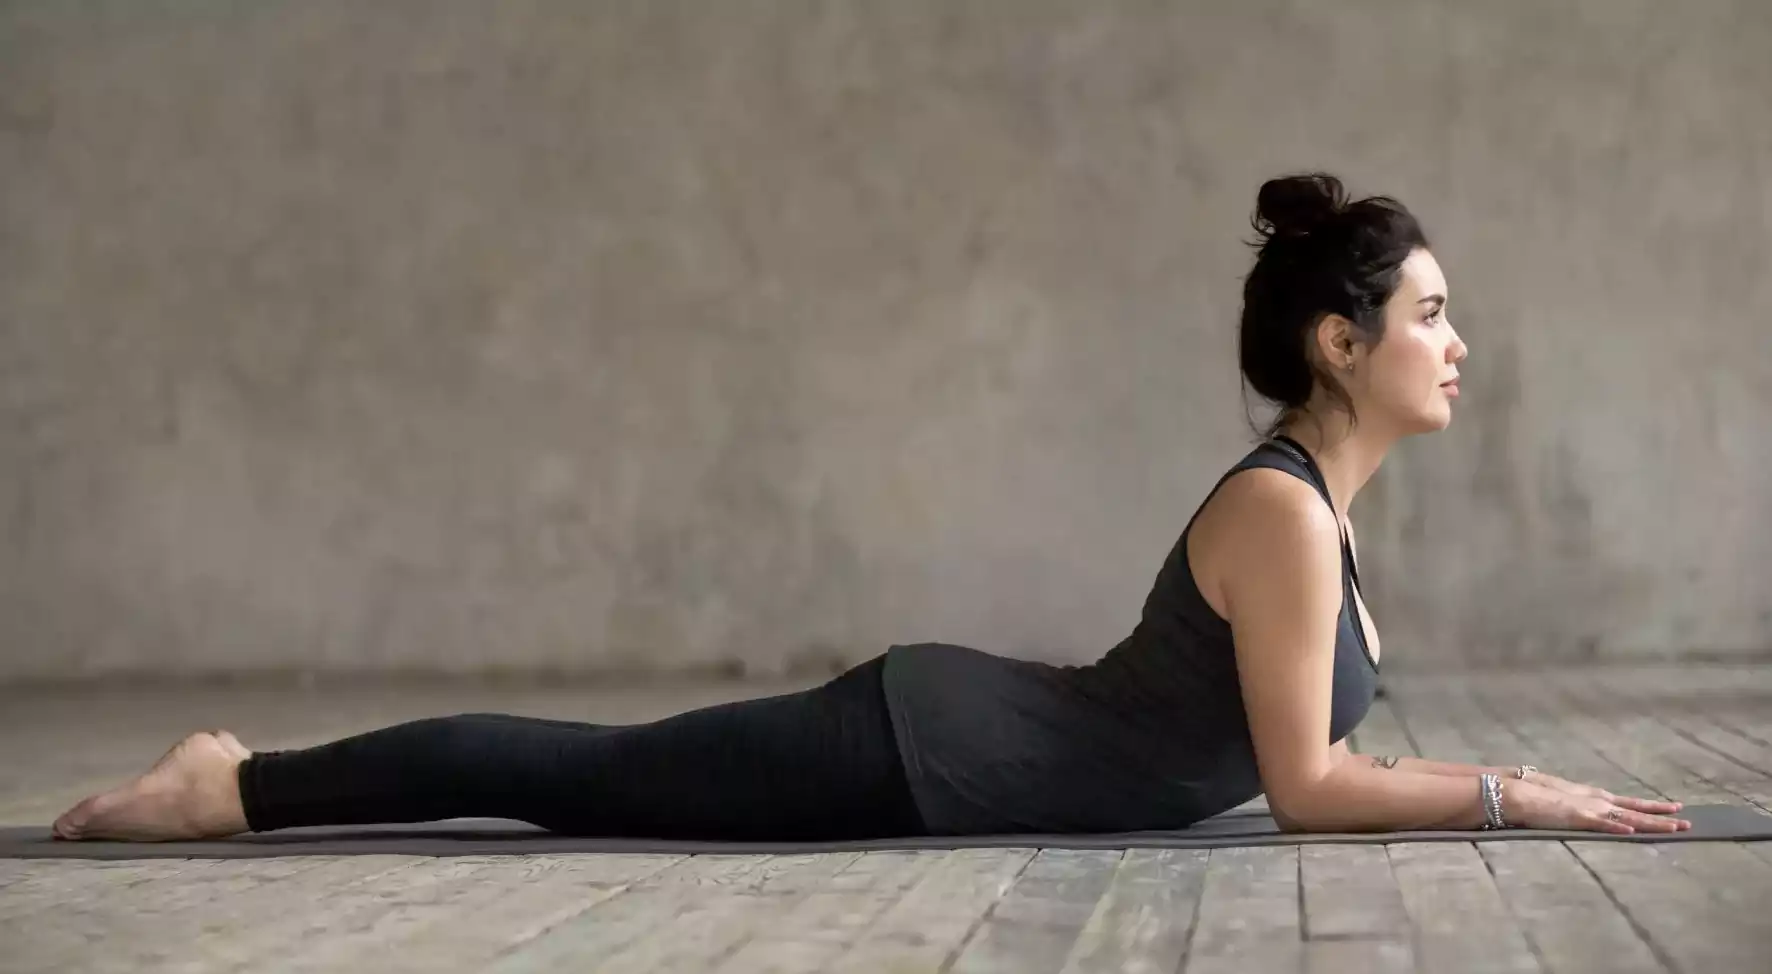
* Downward-Facing Dog
If done properly, this tried-and true asana can be excellent for spinal traction and back health. Move into the pose with feet hip-distance apart [did you know that’s only two fists-width or so?] and hands shoulder-distance apart. It’s important not to let your back arch too much, which pressurizes the shoulder joints and over-contracts the back muscles. Instead, think of lifting the navel and front ribs, providing a buoyancy in the shoulders and back.
Carve the tailbone towards the heels and press back through the inner and outer legs equally. This provides a root, a backward grounding from which you can pull and grow your spine and head forward towards the space between your hands. Even as you move the shoulders down the back and wrap your outer shoulder blades towards your armpits slightly, press long through the arms and fingers, providing a whole-body realignment and stretch. Take 5-10 breaths here, then proceed to the next pose.
* Pigeon
We should call this pose “Angel of Mercy” for what it can do to rescue your poor aching back. It’s genius at opening the lower body muscles like hamstrings, hip rotators and the iliopsoas muscles, all which can contribute to back pain, without putting too much torque on the already tight back muscles.
This releases them by springing open the muscles beneath. It’s a must-do in my yoga sequencing. From Downward-Facing Dog, bring your right knee behind the right wrist, foot either touching the left hip crease or slightly forward.
Stretch the left leg out long behind you, knee and top of the foot facing the floor. Center your hips in space even if they don’t touch the floor.
Press your palms into the floor or a yoga block, ground your legs into the mat, and allow your legs to stretch while you let your low back curve and lift up. Draw your navel and pelvic floor muscles in and send your heart to the sky. To deepen this pose, move your front knee wider and back and creep the back leg longer. Take 5-10 breaths here, then fold forward, forearms on a block or the floor for a full-body stretch to counterpose. Return to Downward-Facing Dog, then repeat on the other side.
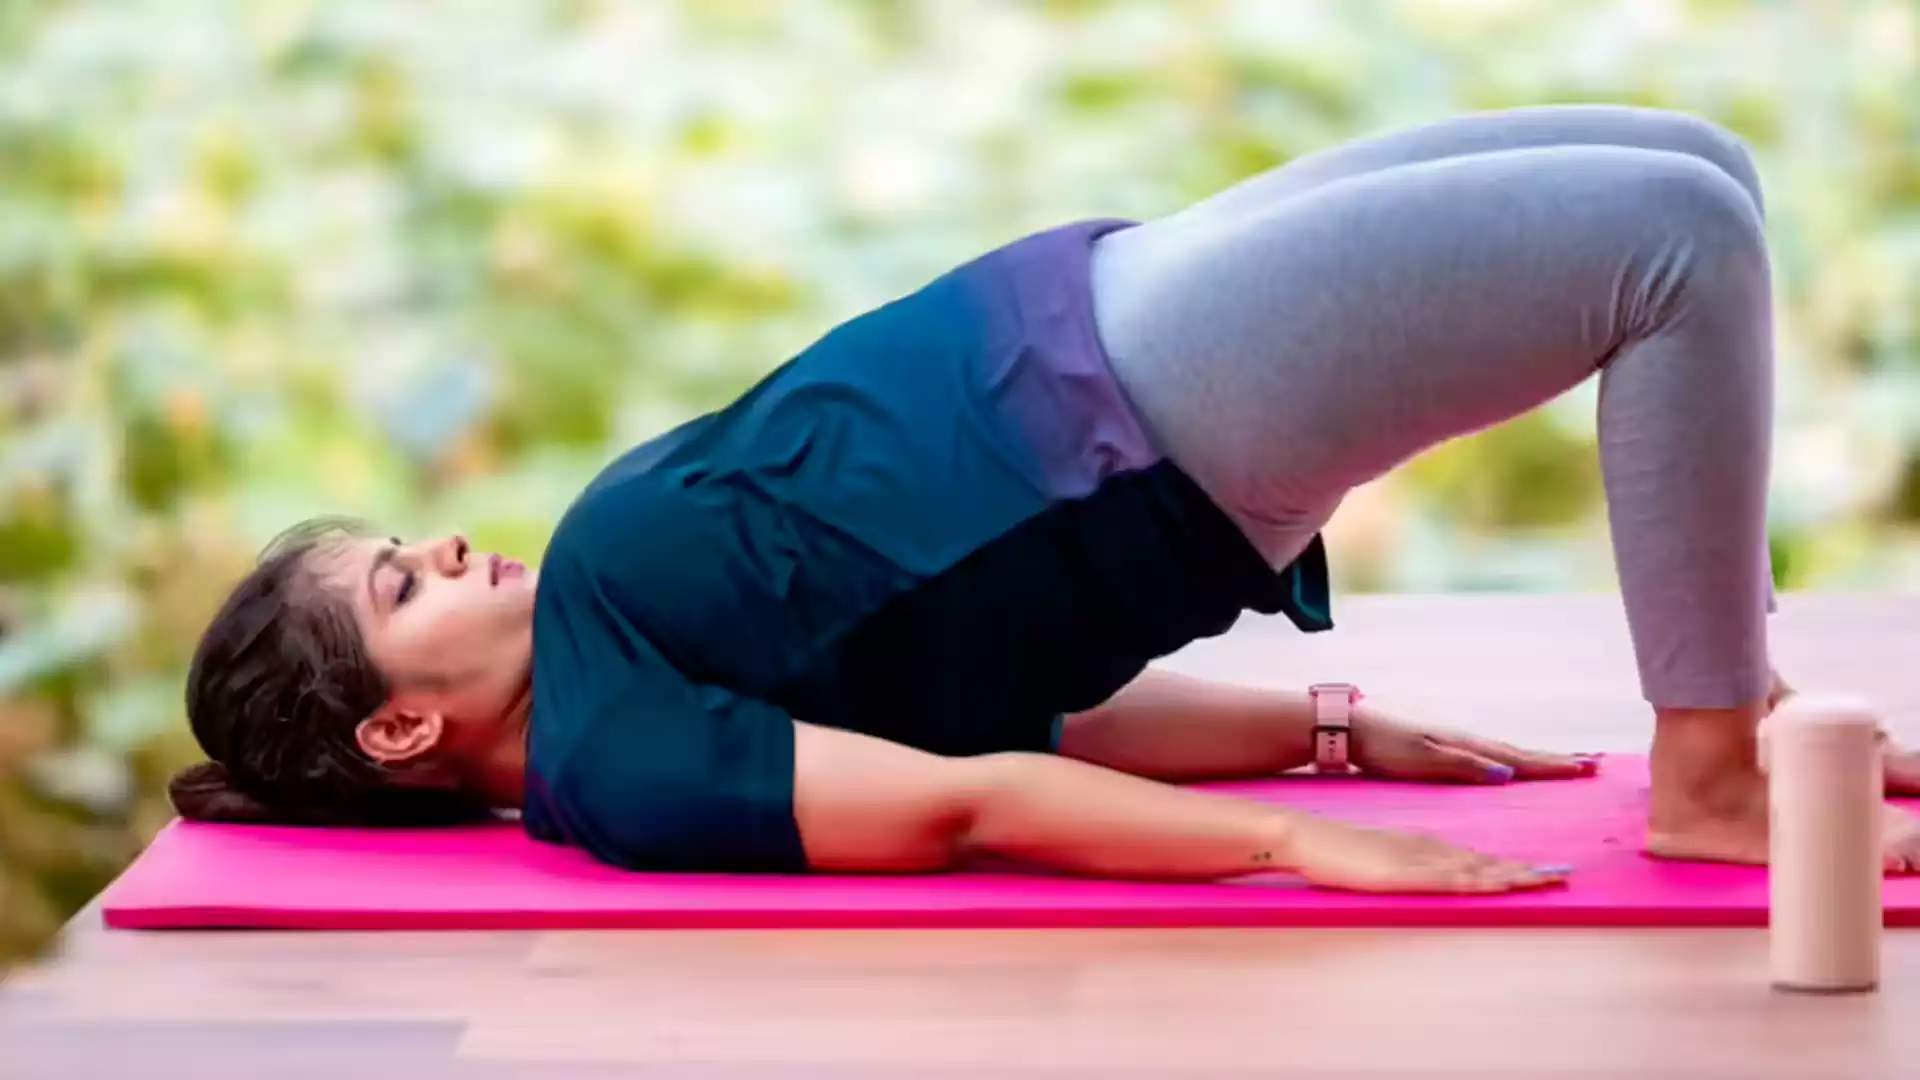
* Back Traction Pose
After your last Pigeon, swing your back leg around and come onto your back, knees bent, feet under knees as if to prepare for a Bridge Pose. Grab your yoga block or if you don’t have one, a firmly-rolled yoga mat will do. Lift your hips, and place the block in the center of your hips (not low back).
The block should be the skinny way, in the same direction as your spine, not wide across the hips like your pants line. Place your hips on the block and gently walk your feet wide. Knock your knees in towards one another for one minute to stretch across the sacrum, and then walk feet and knees together.
Lift your knees over your hips until you can relax them but still stay suspended in the air. This pose will release your iliopsoas muscles even as it detoxes you and provides traction for the low back spine. After about 30 seconds or so, scoot your head further from the shoulders and rest for another 30 seconds. Return to the first variation, feet wide on the floor, knees closer, for a few breaths. To release, walk the feet under the knees at hip distance.
Engage your navel, lift your hips off the block and remove it to the side. Roll slowly down the spine inch by inch and enjoy your new spacious lower back curve and sacrum!
* Child’s Pose
Roll over and take Child’s Pose for one minute or more. Try knees wide, big toes closer, but end with knees together for a neutral spinal stretch. If your head doesn’t touch the floor, place a yoga block or fists under your forehead so you can relax completely. Breathe slowly into your back body, expanding more nourishing energy and space on the inhale, and on the exhales, let ever more tension dissolve.